Implement webhooks
Essential information
To be able to fully use our Webhooks and make the most out of them you need to have access to your Ticketino-account, to access the Cockpit, as well have an account for Zapier, or a comparable platform of your choosing. We will also add a short guide on how to setup a Zapier action.
For the used communication tool, it is up to you to make sure that said tool is working properly as this is outside of our reach/accessibility.
What are Webhooks?
Webhooks are a simple solution to notify yourself or someone else about events happening on website. These hooks will be triggered automatically and will be sent by the Website-host to your chosen Webhook-tool. These webhooks will contain a JSON-Object with pre-determined attributes inside it, which you will be able to access and use for your tracking or goal. This webhook will only be sent to the link you will hand over to our system, so you can be sure that the mentioned information will not be spread.
Here you can read a more detailed explanation about Webhooks made from Zapier: https://zapier.com/blog/what-are-webhooks/
Possible triggers for Webhooks
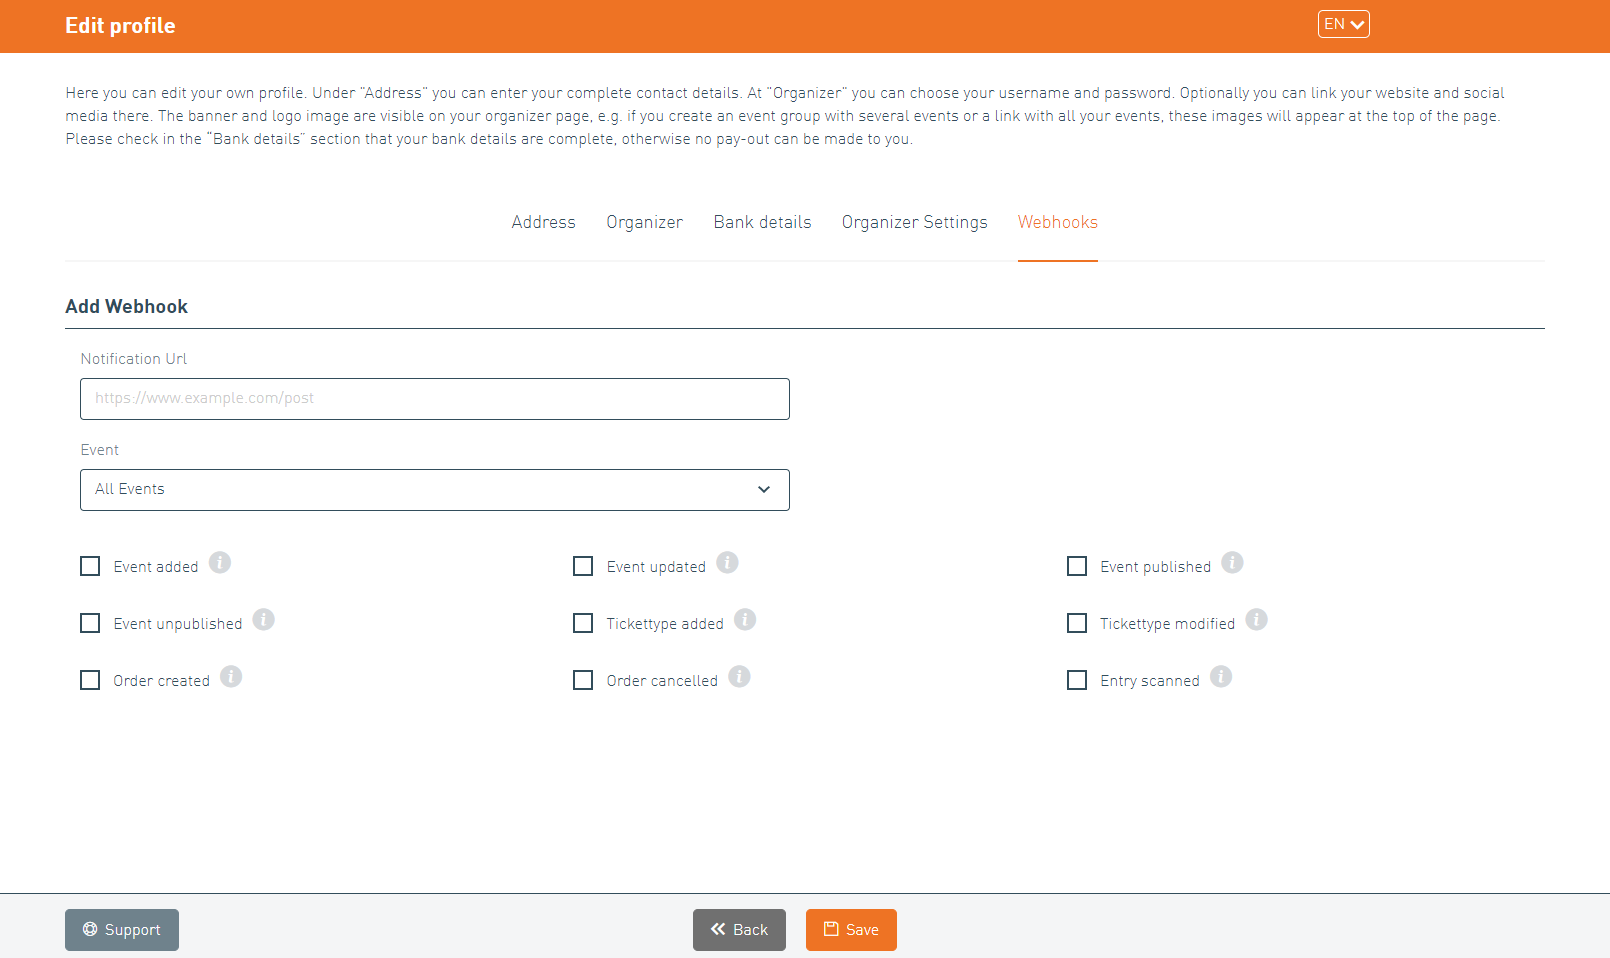
There are currently nine different Webhooks that are selectable. You can select a multitude of different hooks and be notified about every action happening or only be informed once certain actions have been made. Beside each of the selectable hooks you can see an information-box that includes extra information about the hooks or explains in greater detail, when the webhook gets executed on our end. Currently the following webhooks are accessible:
- Event added
- Event updated
- Event published
- Event unpublished
- Tickettype added
- Tickettype modified
- Order created
- Order cancelled
- Entry scanned
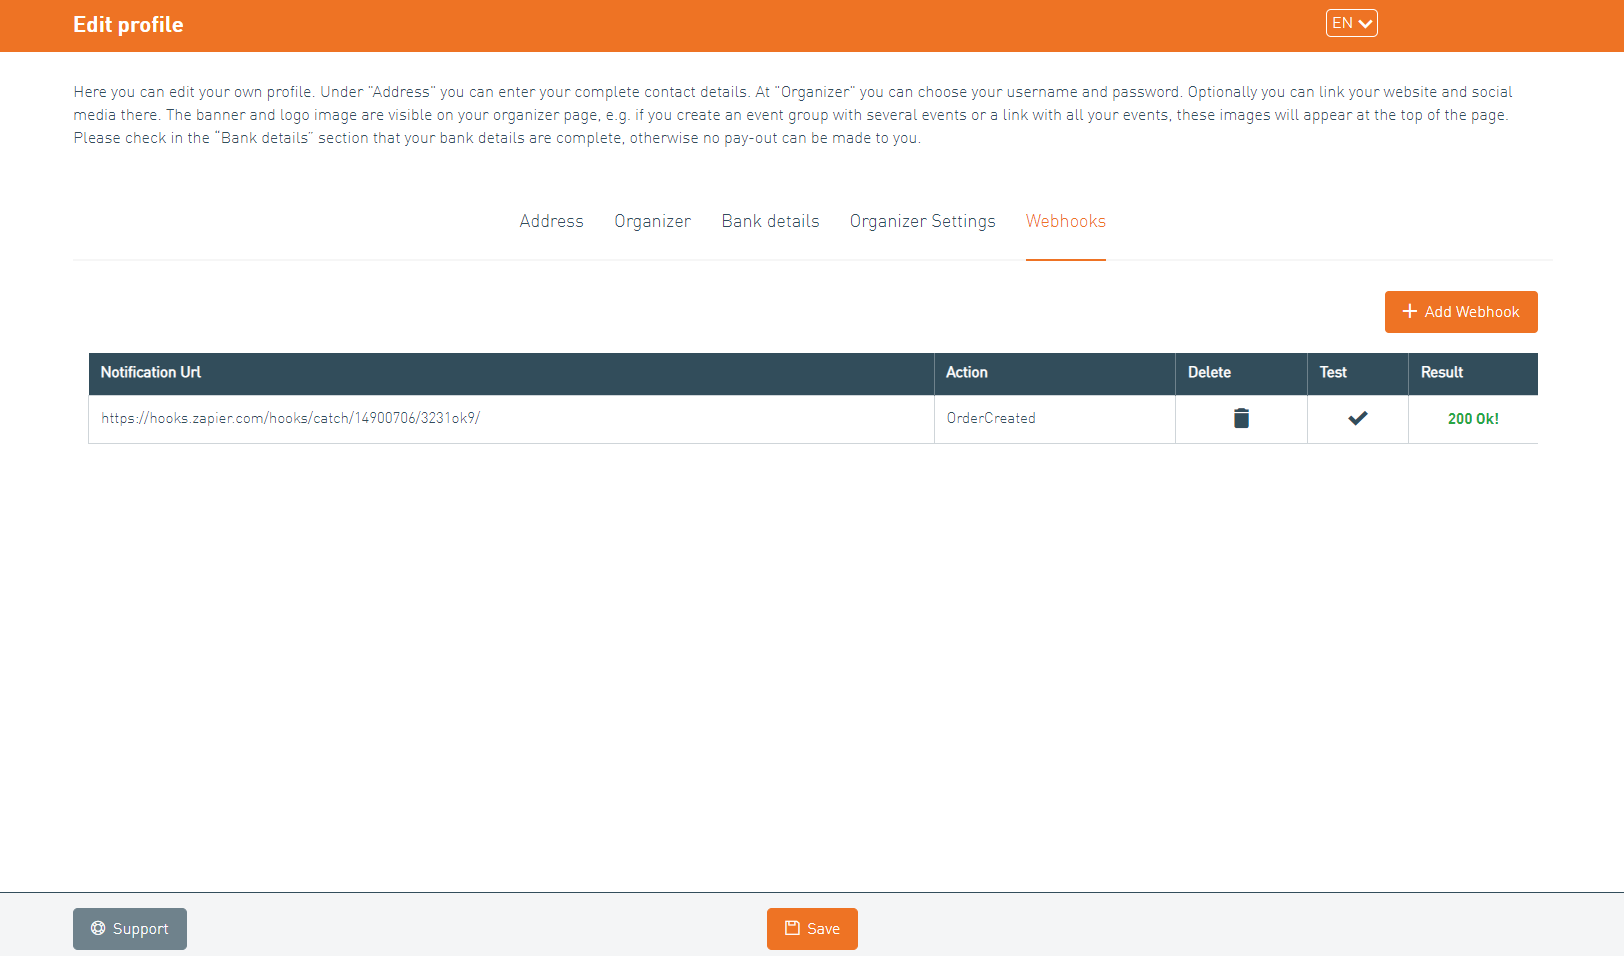
Where to add the webhook? (Cockpit)
Once you have a created an “action” on your webhook-tool and gotten the corresponding url-link on Zapier or a comparable tool, you can go to the Cockpit. Once you have accessed the Cockpit, you need to go to your Profile and there you will see a newly added tab, in which you can see a table which shows the already existing hooks and a button to create new ones. It is also important to note that you can test your newly created hooks in the table with the test-button. To create a new webhooks simply press the ”Add Webhook” button.
The Webhooks can be created for all of your events or only for a specific event. If you want to select a specific event you can simply choose an event from the dropdown menu which will have the default value of “All Events”. Afterwards you can insert your url-link, for example a Zapier url-link, in the “notification url” textbox. At the end you need to select which triggers you would like to include for your webhook. Once you are done simply press the save button and use the test-button which is shown in the table.
Sample with Zapier
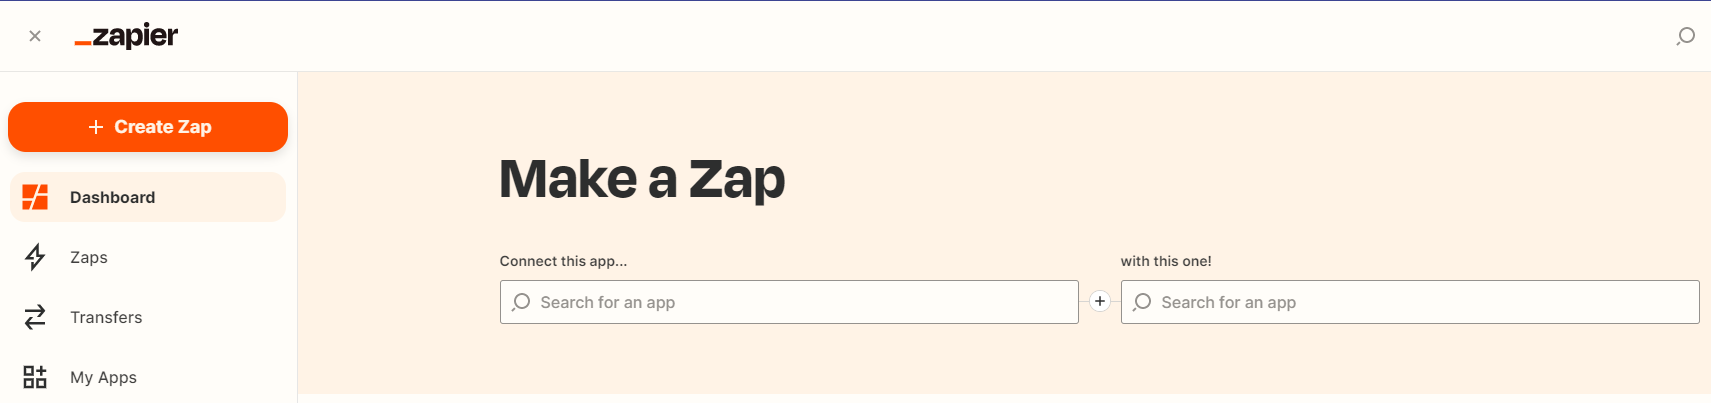
The first step of using the Zapier service is to create an account. You can do the signup at the following link: https://zapier.com/sign-up. After you have logged in you can go to the dashboard. There you should see a button with the following text on it “Create Zap”. You can also find a screenshot of the dashboard, screenshot-date: 30.04.2023.
After having pressed the button you should get re-routed to a new page in which you now need to select your trigger. In the example we will use “Webhooks by Zapier”. After you have chosen the method, you can choose the event. For the event you need to select “Catch Hook”. Afterwards you can select a child key in case you want one. If not, you can simply press the continue button.
It is advisable that you save the Webhook URL somewhere as this is needed in the Cockpit and also test the trigger. Now you can create a Webhook in the cockpit with the newly acquired URL.
Now you should test your trigger, to test simply use the test-button, which can be found in the cockpit. In case it doesn’t work, please wait a handful of minutes as it might take a moment to setup and connect everything. If there are still problems after ten minutes or more please check all the setting and selected attribute. In case you get the following error "resource not found", go to the cockpit and press the test button for your webhook. If the test is successful, you can continue to the next step or if you don’t feel the need to test you can skip the tests and continue on with the creation of the Webhook.
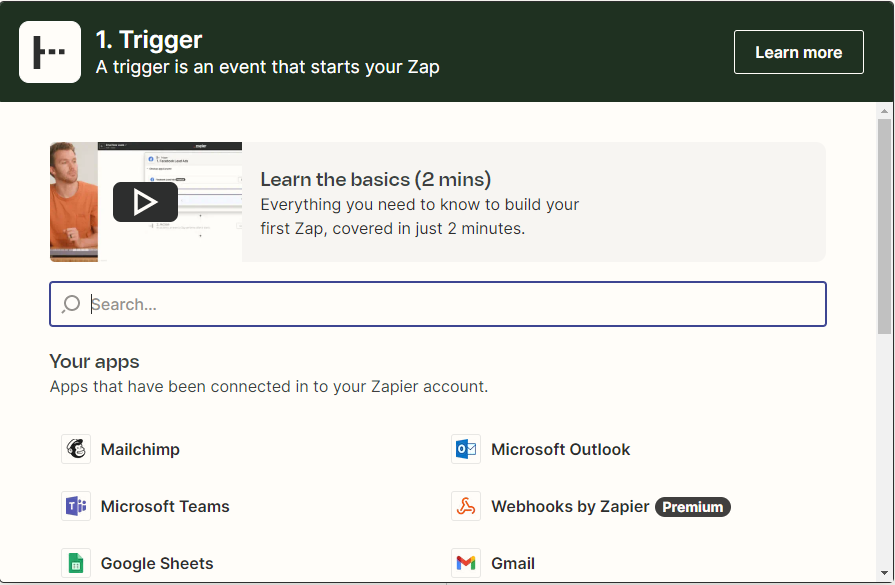
Step 1.1, Choosing App
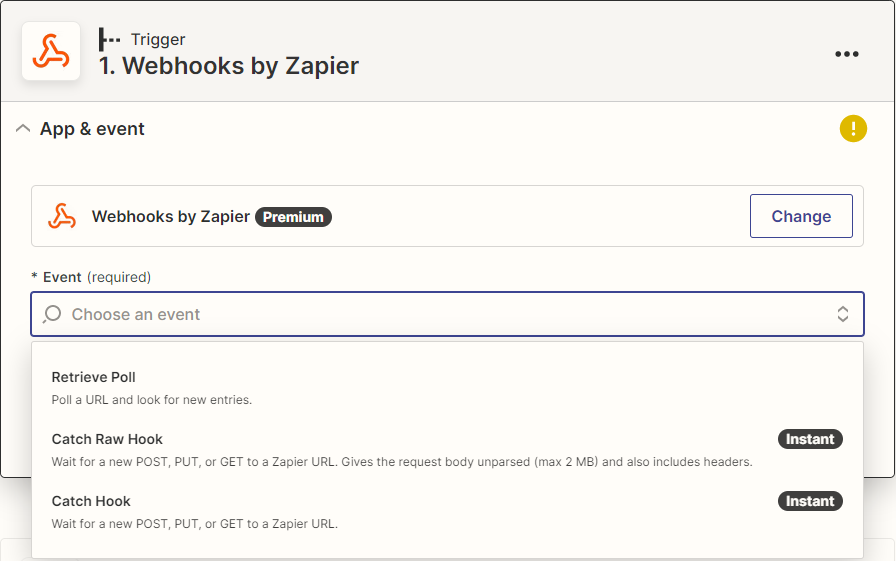
Step 1.2, Choosing Event
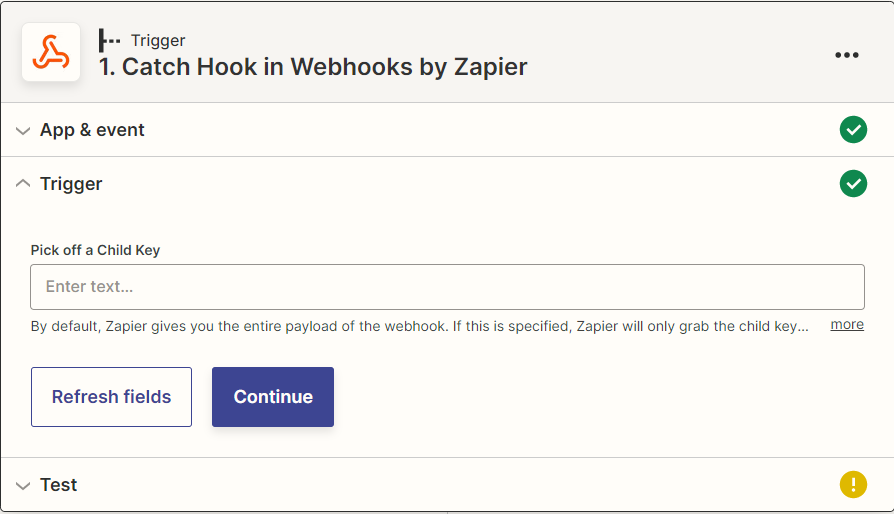
Step 1.3, Choosing Child key if wanted

Step 1.4, Test Trigger, in case this message appears use the Test-Button in the Cockpit
This concludes the first major step. Your next step is to setup the action that you would like to be executed upon hitting a trigger. For this example, we select the “Microsoft teams” in the selection. Depending on your selection you will need to enter specific information or connect your account to certain services. But as soon as you have chosen your account you can select a chat, from the given account, from the dropdown menu. After the dropdown you can create your message. There you can insert the wanted text and also access the attributes in the JSON-file which was mentioned before. In case you are unable to see the JSON-attributes you can press the test-button in the Ticketino-Cockpit, and afterwards the attributes should be displayed in “Insert Data…” tab. Once you have done all of your setting you can test your newly created Zap and check that everything is working. Once you have published your Zap everything should be up and running.
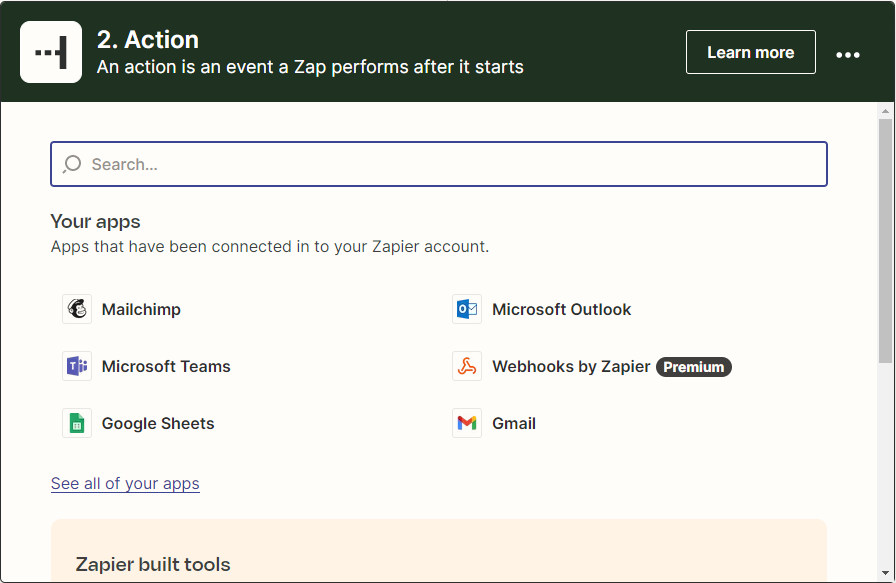
Step 2.1, Choose Reaction-App
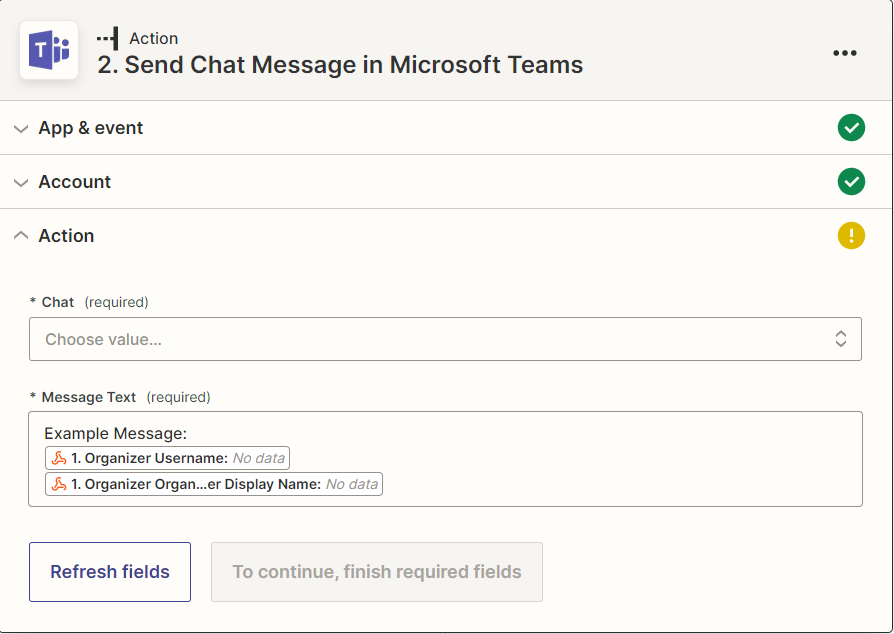
Step 2.2, Write your personalized message
The official Zapier documentation: https://platform.zapier.com/quickstart/introduction